![]()
![]()
Frequently Asked Questions / Help
CheckNotes
 *Available in the Premium Version
CheckNotes bring POWER to your observations!
- CheckNotes allow you to track the types of contributions of each participant
- Choose from among 17 templates with pre-loaded characteristics to track
- Create your own custom template using the “My Template” CheckNote
- Edit or add characteristics to any of the existing templates
Choose from among the following templates:
- Classroom Observations
- Common Core (Speaking and Listening Grades 5-8)
- Common Core (Speaking and Listening Grades 9-12)
- Critical Friends Group® work by NSRF® (Text Based Protocols)
- Critical Friends Group® work by NSRF® (Tunings & Dilemma Analysis Protocols)
- General Group Discussion/Dialogue Template
- Group Discussion Style A
- Group Discussion Style B
- Literature Circles
- Professional Learning Communities (PLC)
- Professional Meeting Style 1
- Professional Meeting Style 2
- Socratic Seminar Observation Style 1
- Socratic Seminar Observation Style 2
- Socratic Seminar Observation Style 3
- Socratic Seminar Observation Style 4
- Spider Web Discussion™ (based on work by Alexis Wiggins)
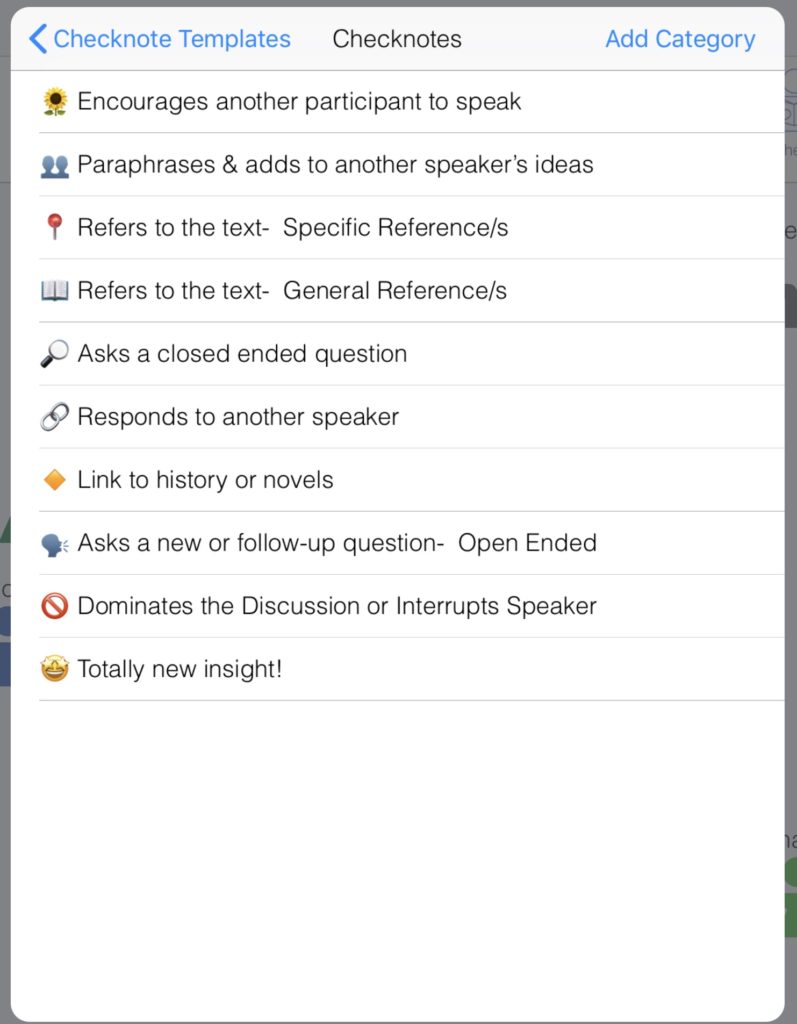
Sample CheckNote Template: [Group Discussion A]
![]()
Category:
CheckNotes
 0
0
 0
0
![]()
*Available in the Premium Version
Choose a CheckNote Template or Create your own:
- From the main menu tap “Create a New Map” or “Map Existing Group”.
- Select the existing group, or if this is your first group, add a group name, choose a layout, and tap “Continue”. (Hint, the yellow classroom layout will allow you to freely place participants anywhere on the screen.)
- Tap “Done” to enter the mapping screen.
- BEFORE you begin mapping, tap the blue settings icon in the upper right corner

- Tap “CheckNote Template” and the list will appear.
- Tap “View/Edit” to view the characteristics of each template or to edit your desired template.
- Once you’ve selected the template you want to use, tap “Back” and you will be prompted with the following:
- “Would you like this as your default CheckNote template? YES/NO”
- Tap “Yes” and that CheckNote template will be included with all future groups until you edit the existing template or select a new template.
- Tap “Close” and you are ready to start your class or meeting!
To learn more about how to edit or create your own template, click <HERE>
Sample CheckNote Template (Socratic Seminar):
Category:
CheckNotes
0
0
![]()
*Available in the Premium Version
Using CheckNotes while mapping:
- While mapping a class or meeting, select the participant who is speaking.
- Participant’s icon will flash slowly.
- Tap “CheckNotes” in the top right of the screen while the participant is speaking:
- Tap on each CheckNote Characteristic that applies for the speaker.
- Tap “Submit” when completed or when someone else speaks.
Sample CheckNote Template (Socratic Seminar):
Category:
CheckNotes
1
0
![]()
*Available in the Premium Version
Edit a CheckNote Template or Create your own CheckNote Template:
- From the main menu tap “Create a New Map” or “Map Existing Group”.
- Select the existing group, or if this is your first group, add a group name, choose a layout, and tap “Continue”. (Hint, the yellow classroom layout will allow you to freely place participants anywhere on the screen.)
- Tap “Done” to enter the mapping screen.
- BEFORE you begin mapping, tap the blue settings icon in the upper right corner
- Tap “CheckNote Template” and the list will appear.
- Tap “View/Edit” view or edit your desired template.
- You can tap on any characteristic to edit the description, you can swipe left to delete a characteristic, or you “Add a Category” to add a new characteristic.
- To create your own template, tap “My Template”, which will be blank upon download of the app.
- Tap “Add Category” to add a characteristic.
- Swipe any category left to delete the category from the template.
- We recommend using an Apple symbol or emoji for each Characteristic for quick and easy reference while mapping.


- Once complete tap “Back” and you will be prompted with the following:
- “Would you like this as your default CheckNote template? YES/NO”
- Tap “Yes” and that CheckNote template will be included with all future groups until you edit the existing template or select a new template.
- Tap “Close” and you are ready to start your class or meeting!
Sample CheckNote Template (Socratic Seminar):
Category:
CheckNotes
1
1
—